Do you ever find yourself wondering how simple it is to make a clipping path in Photoshop? If so, this is the best way to answer your question. In order to create a homemade clipping path around an image in Photoshop, clipping paths must be converted into a closed vector path using the Pen tool. They let you remove things from a picture without sacrificing their transparency or quality.
Follow these 10 steps properly
Step 1: Drag your photo after launching Adobe Photoshop
Launch Adobe Photoshop and open the image you want to edit. You can select any image according to your preference.
Step 2: Pick the pen tool from the primary toolbar
Pick the Pen Tool, From the Main toolbar Manu. This tool will allow you to create a path around your product.
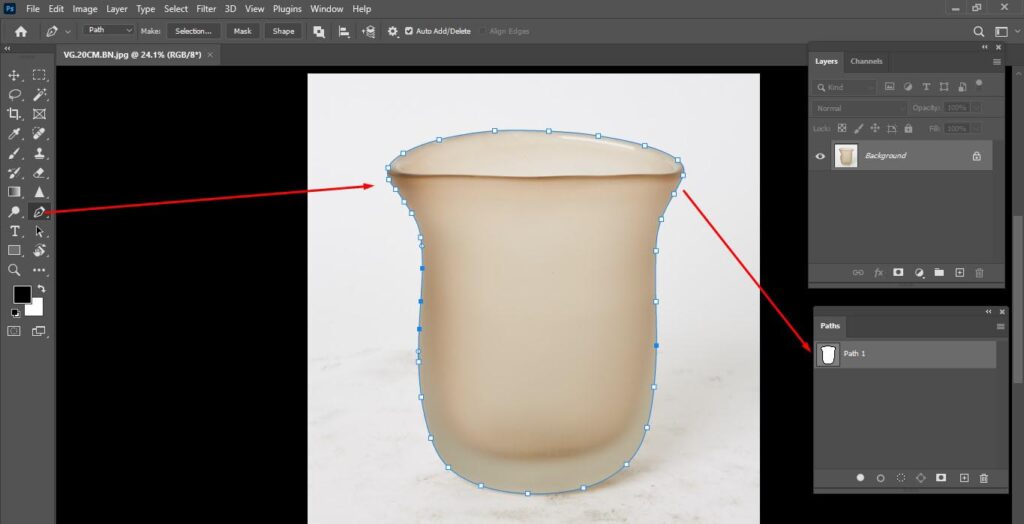
Step 3: Make new path to keep Path.
To produce a clipping of the image, choose a new one as shown in the image below. If the path choice does not appear immediately, you can choose the path from the windows in the menu up top.
Step 4: Start drawing with pen tool
Zoom it at least 300% on image when use pen tool to see the edges properly. It’s better to place it at nearly 300%. After, begin pointing at the corners of the object you wish to cut out. Anchor points are the renames conferred to these sites.
Step 5: Create a clipping around your image
Make sure the path is appropriately clipped; the amount of time it takes to generate a clipping path may vary depending on the geometry of the object. so keep quality on your image to have a clipping path properly.
Step 6: Use ‘Ctrl + Enter’ for selection path
Use the keyboard shortcut “Ctrl + Enter” to selection the clipping path that you have created. then you can see the selection of the image to remove finally the image backdrop.
Step 7: Use "Shift+F6" to smooth edge
For smooth shape edges, use 0.5 feathers. Select “feather” under “select from the above menu,” then click “modify.” Shift + F6 is another shortcut you have access to.
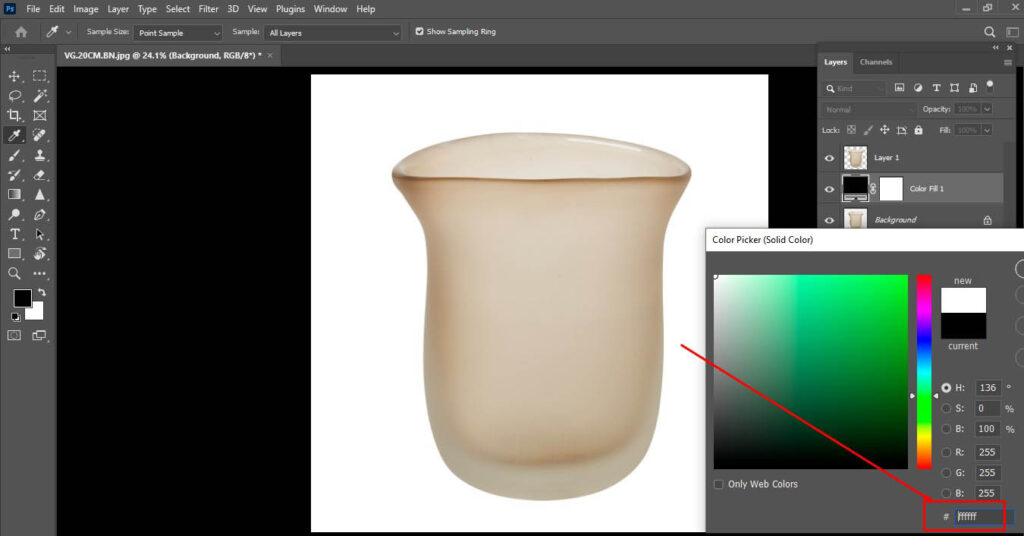
Step 8: Copy 1 layer from the main layer
Copy the layer from main layer panel and masks it on copy layer. make a layer of solid color for change background.
Step 9: Finished the Process You have successfully done it.
Finished! Your attempt to make a clipping path for your image has been successful. Please be aware that your need can be any color of your choice.
Step 10: Save the Photo in Your Drive
The last thing that you have to save the clipping path image. Go to “File” then > “Save As” to save your path. In any Format section, choose “Photoshop PSD” with all most of the default settings.
Clipping Path in Photoshop - FAQs
Why is Clipping Path Important?
Clipping is necessary to isolate objects in images from their backgrounds. By snipping your product photos from their backgrounds, you can display your products in different colors or against different backgrounds without having to reshoot. As a result, you have much more creative control over a single image.
What is a Clipping Path in Photoshop?
When other techniques are ineffective, you can use a powerful Photoshop tool called a clipping path to “clip” or remove an object or product from its background. When a product is displayed against a complicated or multicolored background, this technique works especially well.
What tools are used to create a Clipping Path?
The Pen tool in Photoshop is used to create a Clipping Path. It is a selection tool that allows you to create a path around the object manually or subject you would like to clip out.
How do you apply a Clipping Path?
In Photoshop, a Clipping Path must be applied after a path has been created with the Pen tool, saved, and then applied. After applying the Clipping Path, the topic or item will be isolated and the backdrop will be eliminated. The item or topic can then be saved as a transparent PNG file or a new background can be added.
Can you adjust the smoothness edges?
Yes, you can use Photoshop’s “Select > Modify > Feather” or “Shift+F6” commands to change the Clipping Path’s smoothness. The isolated item or topic will have smoother edges if a feather of 0.5 is applied.
✋ Hold On! Try it for free. No Registration Required.
Simply upload your photo to see what our clipping path services can do and get the results within 30 minutes or less.